


My kids wanted to have some lights under their desk. What could possible be better then using an addressable LED strip? You will find many tutorials how to do this but still I wanted to share mine as some of the tutorials were quite complicated. I wanted this guide to be very simple. If you have read here before you might remember that I shared a guide how to make smart lights for your porch outside. In that case we used a non controllable LED (RGBWW) controlled with a Shelly RGBW2 . Now we are going to use an addressable LED. Controlled by a Node MCU. But what is the difference? And What LED should I use?
Addressable means each individual LED can be a different color. Non Addressable means all the LEDs have to be the same color at once.
You will find variants like WS2812B or WS2813 when it comes to addressable LEDs. They use different chipsets. The chipset controls the led strip. When it comes to non adressable LEDs the chipsets may be called something like 3528 or 5050.
There are RGB, RGBW or RGBWW. In general the RGB can not display white color and the RGBWW have two white colors. The warm white. In some cases this is important.
Check number of leds per meter. Some LEDs are more expensive but they have twice as many led diods.
Make sure you calculate how many ampere and watts your led strip needs. Some basic power adapters may not be able to power a long led strip. Also decide if you want 5v, 12v or 24v led strips. In my case I want a low power 5v but for my porch I choosed 12v as the strip was 10 meters. Most adressable used 5 v.
The hardware I have used for this project is:
- Node MCU
- 2 Led strips
- Power adapter 5 v
- A 5 v arcade button
- A Case
- Adapter for powersupply
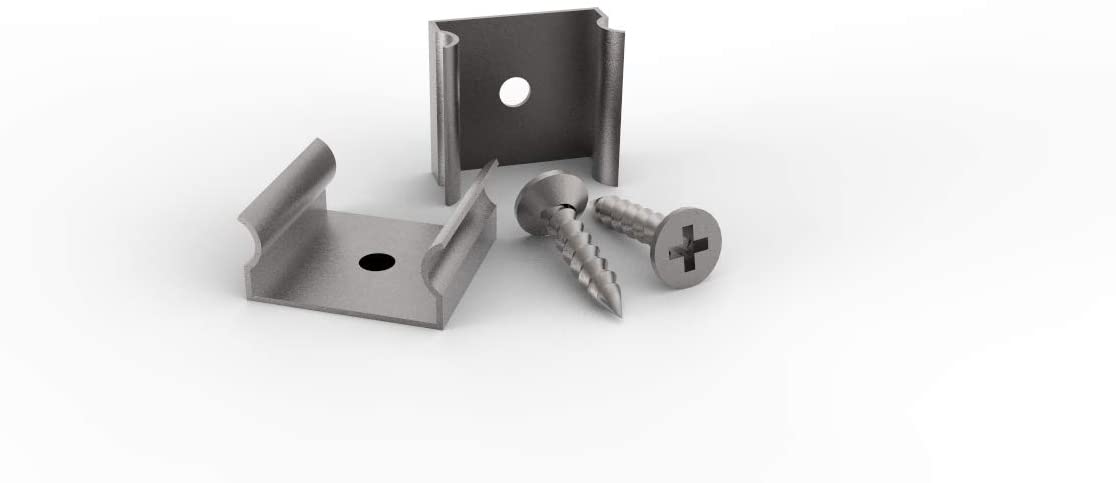
- Led profiles
- Led profile clips
And software: (Make sure you read the WLED documentation)
You will also need some cables and basic soldering skills
Some detailed photos of the items I have used


So let´s get started. It might be a good idéa to first build the led without soldering. When it works solder.
Start by installing the power adapter and the small adapter.
Open one led strip and mount it in the profile if you want. Connect as below. Note that you can add power to the arcade button to light it. However I have not been able to figure out a way to turn it off when WLED is powered off. Note that there will be four connectors on the button but only two will be used here.

Right now nothing will happen. Or you might see some lights. This is because we will have to flash the Node MCU. There are many ways of doing this. I did like this.
Connect a USB cable to your computer. Windows or Linux. Download the tool and also download the image. In my case I used Linux and the gui setup.
So you will need two files. The installer and the bin file.
The flashing procedure may look something like this.

When finished connect the Node MCU again. On your computer connect to the SSID “WLED-AP” using the default password wled1234. Connect a browser to 4.3.2.1.
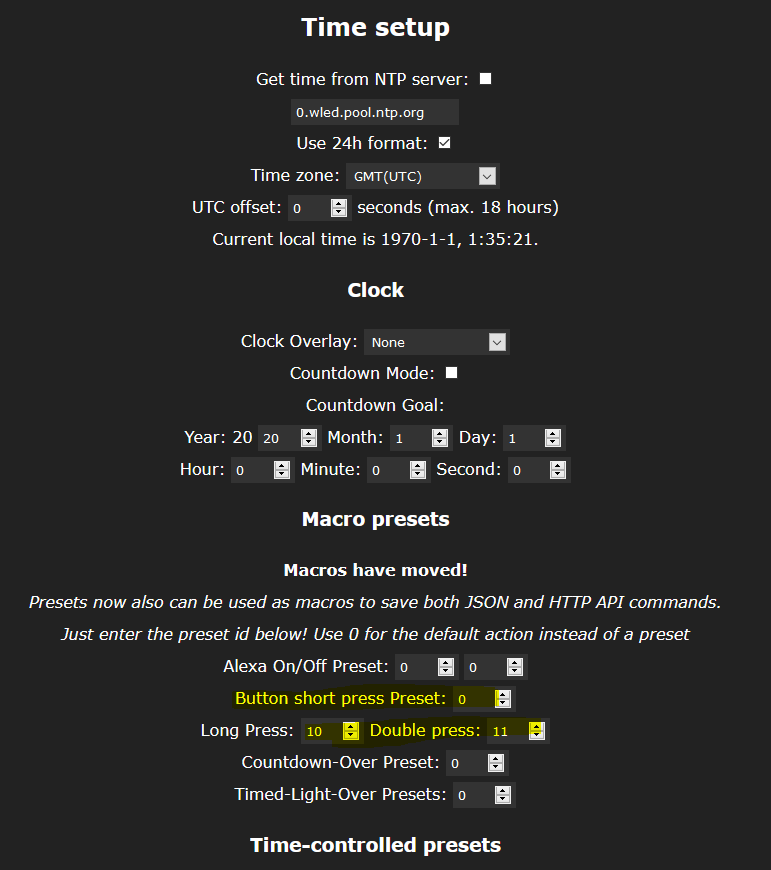
There are some steps you want to do now. Check the images below.
- Configure your wifi
- Set number of leds and button pin
- Set macros or presets for the button
- Save the presets at the main page


You can now double check that it can be reached via the new ip address. Go to the main page and check that it works. Try some effects and colors. Now it is also time to check if the button works.
- One press id power on and off – We set this in the hardware page
- Double press is preset 10 (whatever you choosed
- Long press is preset 10
In this video you will get an idea how it may work.
Nice right. Now we will do the soldering and put it in a nice box. Also mount it in the place it should be. I did use led clips and led profiles to mount under the desk. The final result will look like this.


1 Response
[…] and you can buy any kinds. I did a post some time ago about desktop leds that you can find here. And another one for the fish tank here. Use it with your phone, set timers or build whatever you […]